
Testing your tests: using mutation testing in .NET to increase the quality of your automated tests
One of the most important parts of writing software is writing automated tests. Without automated testing the number of bugs increases, refactoring becomes harder, more time needs to be spent on manual testing, customer complaints increase, etc…
However, writing good tests isn’t easy. It can be hard to spot every edge case. It happens that your tests indicate everything is fine, yet a bug slipped through the cracks anyway.
So how can you be sure your tests are working as intended? How do you increase the quality of your automated tests? Or as the age old saying goes: who watches the watchmen?
Well it might sound a bit absurd, but we’re going to test our tests! To do this, we use a different type of software testing called mutation testing.
Understanding mutation testing
Mutation testing is a form of automated testing that changes the actual source code of the tests you’ve written. Let’s take a look at the example below to see how mutation testing can be valuable.
Code example
We have the following method that multiplies two numbers and returns the result.
public int Multiply(int a, int b)
{
	return a * b;
}
We also have a unit test that tests this method. (I’m using XUnit in this example).
[Theory]
[InlineData(1, 1, 1)]
public void Multiply_ReturnsExpectedResult(int a, int b, int expectedResult)
{
    var result = _calculator.Multiple(a, b);
	result.Should().Be(expectedResult);
}
If I currently run this test it will pass with flying colors. We can also easily see that the code is correct, so everything seems fine.
However, what happens when I accidentally change my multiply method to the following?
public int Multiply(int a, int b)
{
	return a / b;
}
Now we are no longer multiplying. Instead we are dividing. However, the test will still pass because 1 divided by 1 and 1 multiplied by 1 both have the same result. The quality of this test isn’t very good!
How mutation testing can help
The above change is an example of a mutation. You take some code, make a single change in it and see what happens. Things like arithmetic operators, equality operators, booleans, regex, etc.. can all get changed by mutation testing.
Each change (or mutation, if you will) is called a mutant. If your test fails, the mutant is killed. That’s because code changes should make a test fail. If the test passes however, then a mutant survived.
In the example I made the change manually. I wanted to make it clear the test was passing when it shouldn’t. In reality we’ll be using a tool to automatically do these mutations for us.
In short, you want to keep the following things in mind when you’re talking about mutation testing:
- Mutation testing increases the quality of your tests. By making small changes in the source of your tests and then running the test, we can easily find tests that still pass even though they shouldn’t.
- Mutation testing is completely automatic. After a bit of setup and configuration, all your tests will be automatically mutated. No need for extra code to keep mutation tests running. A small investment for what could be a big leap forward in test quality.
- Mutation testing is slow. You shouldn’t be running your mutation tests after every code change like you would a unit test. Instead it’s recommended to integrate mutation tests in your code pipeline, so they run automatically.
Mutation testing using Stryker.NET
There are several mutation testing tools out there, but the one I personally prefer is called Stryker.NET (if you know anything about X-Men, you’ll agree that it’s a fitting name).
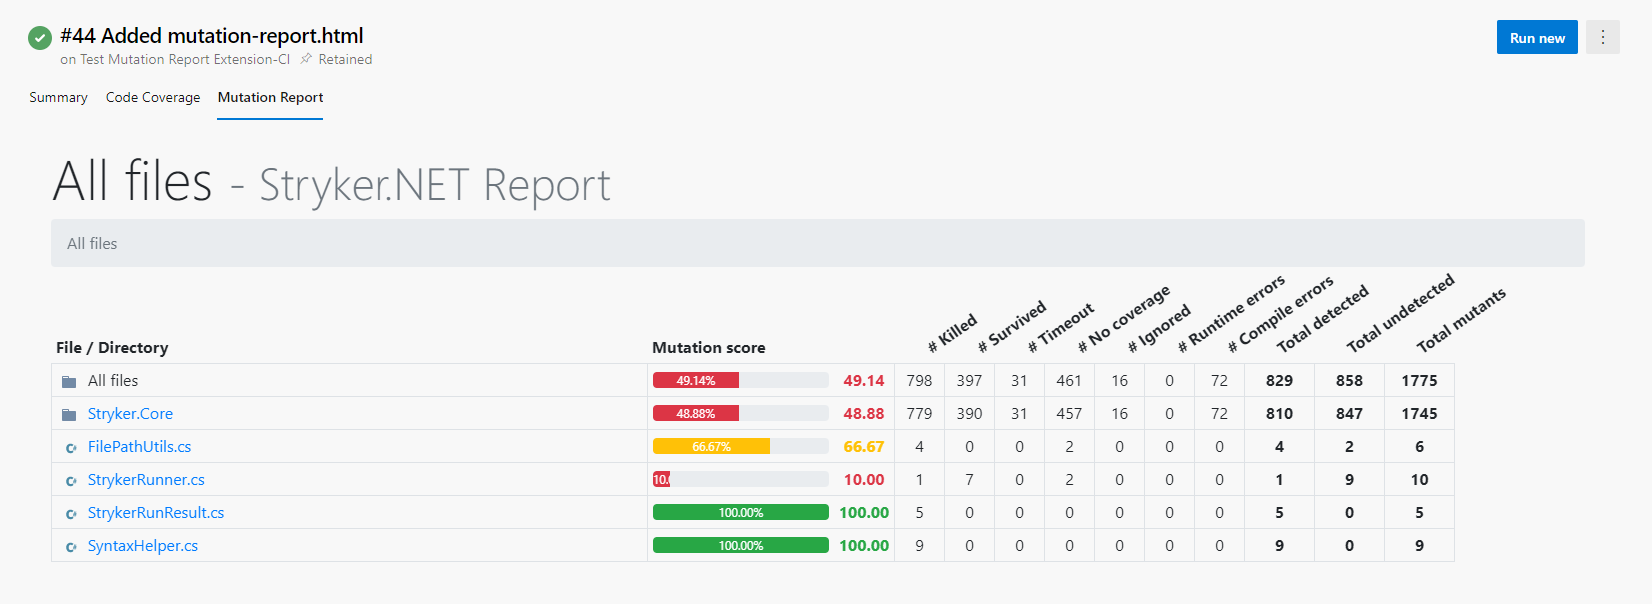
It’s easy to set up and has clear documentation. The reports it generates are also very comprehensive, and you have a choice of several different output formats. One of which is a html report that is especially great to work with.
Here’s a screenshot of the html report:
And this is what you see when you open one of the files:
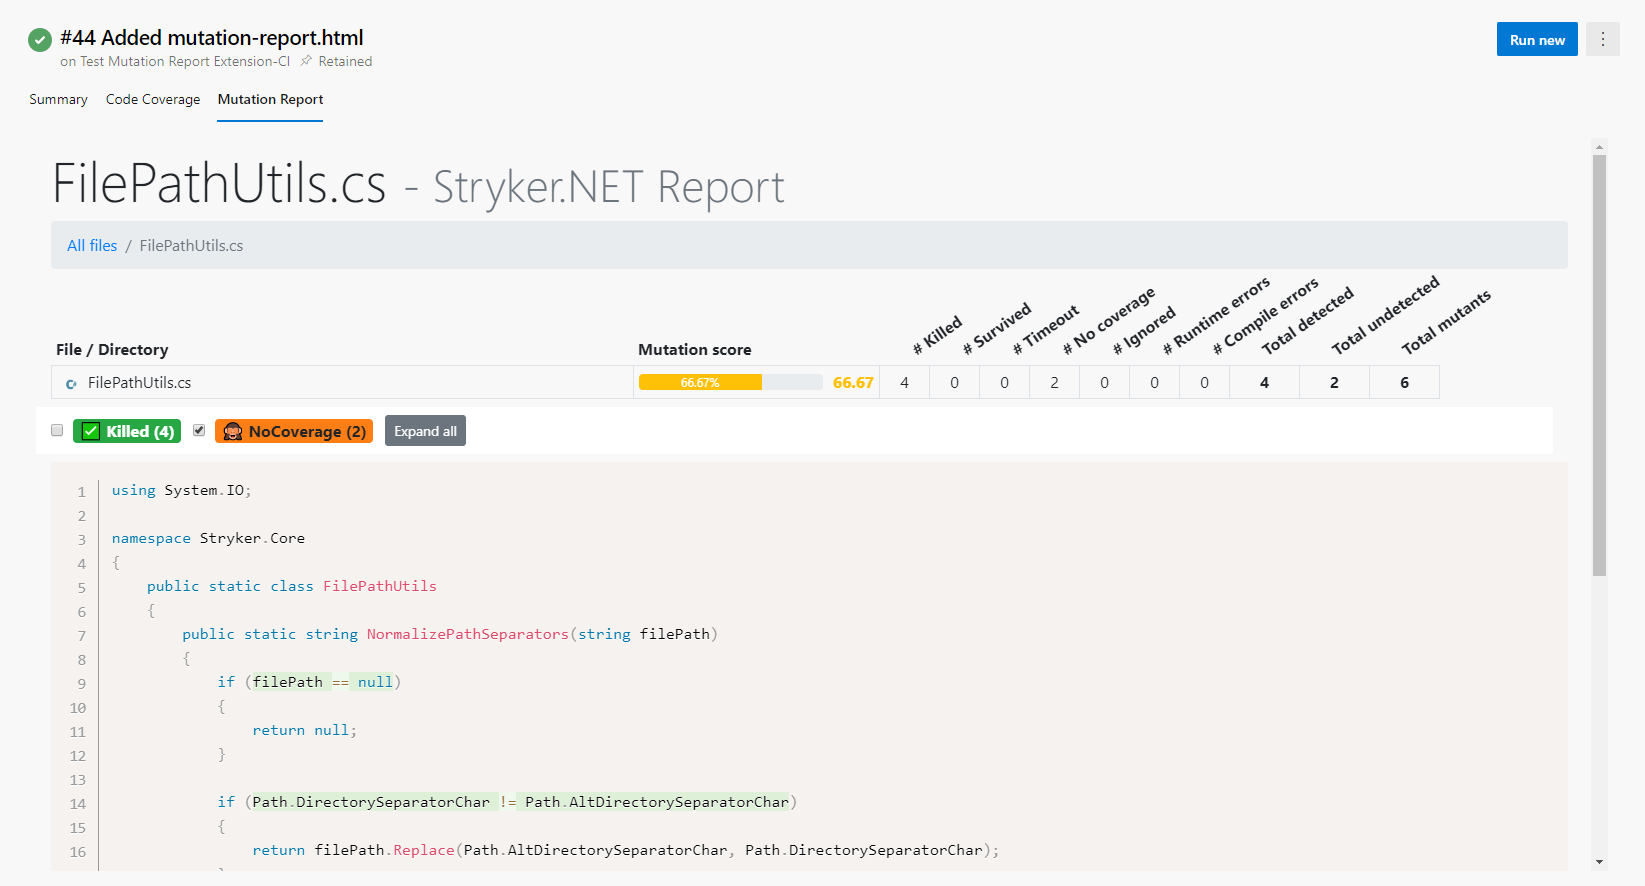
As you can see, the report clearly shows the mutations that have been made. Green means they were killed. Any in red are survivors and require fixing.
If you want to give Stryker.NET a go, check out their Github and the documentation. Again, it’s all very easy to set up and you can be tracking down and destroying mutants in just a few hours. Good luck!
Thanks for reading! If you would like to stay up-to-date with my blog, consider subscribing to the codecrash newsletter. You'll receive an email whenever I publish a new article.